Latest Posts

Revision Season Is Starting: How to Make Your Student Room Better for Focus
When revision season begins, most students think first about timetables, flashcards and past papers.
But the room you revise in matters just as much as the notes in front of you. A cluttered, dim, noisy space can make even simple tasks feel harder, while a calm and well-set-up room can help you stay focused for longer without feeling completely drained by the end of the day.
For students across the United Kingdom, whether studying at the University of Birmingham, the University of Nottingham, the University of Leeds or De Montfort University, exam season often means long hours spent in bedrooms, halls and shared houses.
That makes your room more than just a place to sleep. For a few intense weeks, it becomes your library, your study zone and your recovery space too. The challenge is making it work for all three.
Start With Lighting That Helps You Stay Alert
Lighting has a bigger effect on concentration than many students realise.
If your room is too dark, revision can quickly feel tiring and heavy. If the light is too harsh, it can leave you feeling uncomfortable and restless, especially during evening study sessions.
Natural daylight is usually the best place to start. If possible, position your desk close to a window so you can work with decent daytime light. Even a small amount of natural brightness can make your room feel more awake and less boxed in.
If your room does not get much daylight, a good desk lamp becomes far more important.
Aim for lighting that is bright enough to keep you alert without making the room feel clinical. A focused desk lamp for reading and writing works better than relying only on one overhead ceiling light.
During revision season, the goal is not to create a perfect Pinterest study room. It is to reduce eye strain and make it easier to settle into work.
Create a Desk Setup That Makes Revision Easier
A productive desk setup does not need to be expensive, but it does need to be practical.
Many students revise while half-sitting on the bed, balancing a laptop on their knees and wondering why they cannot concentrate for more than twenty minutes. That setup might be fine for watching a lecture back, but it is rarely ideal for serious revision.
Try to create a clear distinction between where you work and where you switch off. If you have a desk, keep it as dedicated to study as possible. Make space for the essentials: your laptop, notebook, charger, water bottle and the materials for the subject you are currently revising.
The less visual chaos there is, the easier it is to get started.
Chair comfort matters too. You do not need a luxury office chair, but you do want something supportive enough to help you sit properly for a decent stretch of time.
If your setup is awkward, your body will start distracting you before your brain even gets going. Small fixes such as raising your laptop, improving posture or clearing away yesterday’s coffee cups can make revision feel far less frustrating.
Noise Control Can Protect Your Energy
One of the hardest parts of student revision is not always the studying itself. Often, it is the background noise.
In shared accommodation, you might be dealing with slamming doors, kitchen chatter, traffic outside or housemates moving around while you are trying to remember theories, formulas or essay points.
You may not be able to control every sound, but you can reduce the impact of it. Noise-cancelling headphones can help if you already have them, but even basic earplugs or steady background sound can make a difference.
Some students focus better with instrumental music, brown noise or gentle rain sounds, while others need silence. It is worth testing what genuinely works rather than what looks productive online.
It can also help to speak with housemates early, especially if everyone is heading into deadlines or exams at the same time. A simple conversation about quiet hours can save a lot of tension later.
Students in busy cities such as Manchester, Bristol or Sheffield often find that the room itself becomes more manageable once they set boundaries around noise rather than just hoping for the best.
Sleep Is Part of Revision, Not Separate From It
When exams are coming up, sleep is often the first thing students sacrifice.
It feels productive to stay up late and squeeze in another topic, but poor sleep usually makes revision less effective the next day. You may spend longer at your desk while remembering less of what you studied.
Your room should help your brain recognise when it is time to work and when it is time to rest. That means avoiding the trap of turning your bed into your main study station if you can help it.
Keep your sleeping area as calm as possible, especially in the evenings. Lower lighting later at night, reduce screen glare where possible and try not to leave your desk in complete chaos before going to bed. A messy room can make it harder to switch off mentally.
Students at universities with intense spring and summer exam periods, such as University College London, the University of Warwick or the University of Exeter, often find that consistency beats last-minute cramming. A better room routine can support that consistency more than people expect.
Hydration and Small Comforts Matter More Than You Think
Revision becomes much harder when you are uncomfortable. Dehydration, overheating, stale air and constant minor distractions all chip away at concentration.
Keeping water nearby sounds basic, but it removes one more excuse to break focus. The same goes for opening a window for a bit of fresh air, keeping a light layer nearby if your room gets cold, or having simple snacks ready so you do not end up wandering off every half hour.
These are not glamorous revision hacks. They are small environmental decisions that make studying feel smoother. The easier your room is to exist in, the easier it is to stay mentally steady through the pressure of exam season.
Keep the Room Calm, Even If Your Mind Feels Busy
Perhaps the most important thing is to keep your room emotionally calm. During revision season, your space should not add to the pressure. That does not mean it has to be silent, minimalist or perfectly tidy at all times. It just needs to feel manageable.
Clear one surface. Put away what you are not using. Keep only the current task in front of you. Add something grounding if it helps, whether that is a soft lamp, a plant, a clean blanket or simply a room that smells fresh rather than stressed.
Your room will not revise for you, but it can either support your effort or drain it.
And during exam season, support matters. A better revision room will not magically make studying easy, but it can make focus feel more possible, and sometimes that is exactly what students need most.
Blogs you may also like:
- Best Study Spots in UK Cities for Winter: Warm, Quiet, and Open Late
- Study vs. Social Life: Finding the Perfect Balance in Your New Home
- Exam Hacks That Students Need to Know Ready for Summer Exam Season
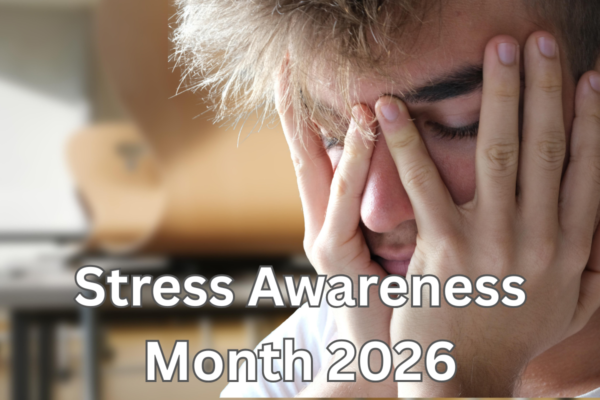
Stress Awareness Month 2026: Top Tips and Ideas to Help Reduce Stress
April has a way of turning the pressure up. The days are getting longer, deadlines start stacking up, revision season creeps in, and plenty of people suddenly realise they have been running on adrenaline, snacks and “I’ll deal with it later” for far too long.
That is exactly why Stress Awareness Month lands at a useful time. Held every April and organised by the Stress Management Society, the campaign is designed to get people talking more openly about stress, recognise the signs earlier, and take practical action before things start spilling into sleep, concentration, health and relationships.
For 2026, the theme is Be the Change, which shifts the focus from simply noticing stress to actually doing something about it.
That matters because stress is not always dramatic. Sometimes it looks like snapping at people for no real reason, feeling oddly emotional over something small, forgetting simple tasks, doom-scrolling when you should be resting, or lying in bed tired but unable to switch off.
NHS guidance highlights that stress can affect your body, mood and behaviour, with symptoms such as difficulty concentrating, feeling overwhelmed, worrying constantly and struggling to relax.
In other words, stress is not “just in your head” in the casual way people often say it is. It has a real impact on how life feels day to day.
What Stress Awareness Month is really about
Stress Awareness Month is not about telling everyone to light a candle and magically become calm. At its best, it is a reminder that stress management is usually about small, repeatable habits and honest conversations, not one perfect fix.
The campaign exists to reduce stigma, improve understanding and encourage healthier ways of coping, whether that means asking for support, changing routines, or simply noticing when your stress has gone from “busy week” to “this is affecting me now”.
For students, this timing is especially relevant. April often overlaps with coursework deadlines, housing worries, exam preparation and money pressure.
Universities across the United Kingdom regularly use this part of the academic year to push wellbeing support more visibly. The University of Glasgow has already highlighted revision and exam season as a time to protect health, wellbeing and focus, while Liverpool John Moores University has linked Stress Awareness Month to support events during the assessment period.
Student Minds, the UK’s student mental health charity, also encourages university communities to talk openly and take part in awareness activity rather than treating wellbeing as something separate from student life.
Why managing stress matters more than people think
A lot of people only take stress seriously when it becomes a full-blown crisis.
The better approach is to catch it earlier. Left unmanaged, stress can start to chip away at the basics: sleep, patience, energy, focus, confidence and motivation. Then those problems create more stress, and the cycle feeds itself.
That is why the simplest support advice is often the most useful. NHS resources point people towards everyday actions like speaking to someone you trust, using breathing exercises, improving time management and making space for things that help you feel more in control.
These ideas sound obvious, but when life gets noisy, the obvious things are usually the first to disappear.
For students at places such as the University of Nottingham, the University of Birmingham, Manchester, Leeds or Bristol, stress can also feel strangely competitive. Everyone looks busy. Everyone looks like they are coping. Everyone seems to have a colour-coded plan. In reality, most people are juggling more than they let on.
Managing stress is not about becoming the most productive person in the library. It is about protecting your ability to function well enough to keep going without burning yourself out.
Top tips that actually make life feel less stressful
One of the best things you can do is lower the number of decisions you have to make when you are already stressed. That means creating a basic routine before things get chaotic.
Pick a rough bedtime, a rough wake-up time, and a couple of anchor points in the day such as breakfast, a walk, or an hour of focused study. Structure does not remove stress completely, but it reduces that constant mental scramble of figuring everything out from scratch.
NHS and university wellbeing advice consistently points back to maintaining the basics because they are what keep your stress from running the whole show.
Another underrated trick is breaking tasks down until they stop looking scary.
“Revise for exams” is stressful because it is vague and massive. “Summarise one lecture and test myself for 20 minutes” is far more manageable. The University of Derby’s exam stress guidance recommends getting organised and keeping things in perspective, and that is often where stress begins to loosen its grip.
Big pressure becomes smaller when it is turned into specific actions.
Sleep deserves more respect too. People love to talk about hustle, but poor sleep makes almost everything harder: concentration drops, emotions feel bigger, and small setbacks start to feel personal.
If stress is interfering with sleep, it can help to stop trying to “win the evening”. Dim the lights, reduce phone use before bed, and avoid turning your room into a second office. You do not need a perfect night routine; you just need a calmer one.
NHS guidance notes that stress and sleep are tightly linked, which is why protecting rest is not lazy, it is practical.
Hydration, food and movement also sound boring until you notice how much worse everything feels without them. When people are stressed, they often forget to drink enough water, skip meals, or sit in the same position for hours. Then they wonder why they feel foggy, irritable and drained.
A short walk, a proper lunch or even standing outside for ten minutes can genuinely interrupt that stress spiral. You are not trying to become a wellness influencer. You are just giving your body half a chance to support your brain.
The social side of stress: talk before you hit the wall
One of the worst things stress does is convince people to go quiet.
They do not want to seem dramatic. They do not want to burden anyone. They think they should be able to handle it. But the advice from NHS resources, Student Minds and university wellbeing teams is pretty consistent: talk to someone sooner rather than later.
That does not always mean a huge emotional conversation. It can be as simple as telling a flatmate, “I’m getting a bit overwhelmed this week,” messaging a friend to go for a walk, speaking to a tutor, or contacting your university support service.
The University of Manchester, for example, signposts confidential mental health support for students dealing with stress, anxiety and low mood, and many other UK universities offer similar routes through counselling teams, wellbeing advisers, chaplaincies, peer support and students’ unions.
Even little things help. Study with someone. Eat with someone. Sit in a different space. Go to that society event you nearly skipped. The 2026 University Mental Health Day theme was human connection, which feels especially relevant here.
Stress shrinks your world. Connection quietly expands it again.
How students can raise awareness and get involved
Getting involved in Stress Awareness Month does not need to be a grand campaign with posters everywhere, although it can be.
Sometimes it starts with changing the tone in your own circle. Be the person who says revision is hard without making it a performance. Share useful support links in the group chat. Suggest a no-pressure library break. Organise a coffee catch-up, a campus walk or a low-key “study and reset” session.
Students’ unions and university societies can do even more. Liverpool John Moores University has highlighted activities such as yoga, sound bath sessions, free lunches and therapy dog events during assessment season, which is a good reminder that awareness works best when it leads to something tangible.
A wellbeing table in the library, a five-minute breathing session before a society meeting, or a social post signposting support services can all make the month feel real rather than symbolic.
You could also use the 2026 Be the Change theme in a simple way: one practical action for yourself, and one for someone else.
Book the GP appointment. Tidy the room that is making you feel worse. Ask your mate how they are really doing. Offer to go on a walk after lectures. Awareness is useful, but action is what changes how people feel.
A calmer month does not have to mean a perfect month
Perhaps the most helpful thing to remember this April is that reducing stress does not mean removing every challenge from your life. It means responding to pressure with a bit more awareness, a bit more honesty and a few better habits.
Some days you will be organised and hydrated and emotionally balanced. Other days you will eat toast at strange times and answer one email as if it is a personal attack. Both are part of being human.
Stress Awareness Month 2026 is a useful prompt, not a test. You do not need to become a completely different person by the end of April. You just need to notice what makes life heavier, what makes it lighter, and what support is already around you.
That alone can be enough to make the month feel more manageable, and maybe even a little kinder.
Blog you may also like:
- How to Raise Awareness for Emotional Health Day
- Living With Housemates: The ‘Low-Drama’ Guide to Chores, Bills, Guests and Noise
- January “Fresh Start” Mental Wellbeing Guide for Students Living Away
Read More

Renting Changes on 1 May 2026: The April Checklist for UK Students
For students renting privately in England, April 2026 is not just another month of coursework, housemate chats and last-minute admin. It is the run-up to a major legal change.
From 1 May 2026, most private assured tenancies in England will move onto a rolling basis, with fixed-term assured tenancies ending under the new system. The same reforms also end Section 21 “no fault” evictions for these tenancies.
That makes this month a smart time to check your paperwork, save key evidence and ask sharper questions before you renew, move or stay put.
First things first: this is mainly about private renting in England
This matters because many students assume all accommodation works the same way, when it does not.
The changes taking effect on 1 May 2026 apply to the private rented sector in England. If you are in university-owned halls, or in some private purpose-built student accommodation that falls within approved student housing codes, your position may be different.
The government’s implementation roadmap says certain private PBSA is exempt, while Citizens Advice separately explains that university halls often operate under different arrangements from mainstream private renting.
So if you are at the University of Nottingham, the University of Birmingham, University of Manchester, University of Leeds or Bristol, the first question is not “what year am I in?” but “what kind of accommodation do I actually have?”
So what does “rolling tenancy” actually mean?
In simple terms, a rolling tenancy, also called a periodic tenancy, no longer has the classic fixed end date many students are used to seeing in a 10- or 12-month contract.
Citizens Advice says that from 1 May 2026, a fixed-term private tenancy in England will become periodic because of the legal change, unless a valid eviction notice was served before that date. Under the new system, tenants can usually leave by giving 2 months’ notice, rather than being tied to a set end point in the same way.
That sounds more flexible, and in many cases it is. But for students it can also create practical questions. If you normally plan your housing around the academic cycle, summer move-outs and friendship groups, you do not want to make assumptions.
A house near the University of Nottingham or De Montfort University might still feel “student-style” in how it is marketed, but the legal structure underneath it may now work differently. That is why April is the month to pin down the details, not May.
The April checklist: what to save before anything changes
Before you email the agent, save your evidence.
Download your signed tenancy agreement, guarantor agreement, deposit confirmation, inventory, rent schedule, repair emails, WhatsApp messages about promises made, and any advert screenshots showing rent, bills, room contents or move-in dates.
If a listing promised “all bills included”, “free parking”, “new mattress” or “professional cleaning before move-in”, keep proof of it. The government has also published an official information sheet that landlords and agents must give tenants about the changes, so save that too if you receive it.
It is worth taking fresh screenshots of your online portal as well: current balance, deposit status, maintenance logs and renewal offers. Students are often juggling deadlines and housemate conversations at the same time, and the small details are the first things that disappear.
The questions to ask your landlord or letting agent now
If you are renewing soon, ask direct questions in writing.
Start with the basics: “Will my tenancy become periodic on 1 May 2026?” “Does my accommodation fall under the new tenancy rules?” “If I stay after my current term, what notice do I need to give?” “How will rent increases be handled?” “Are there any changes to the deposit, guarantor terms or utility arrangements?”
Shelter says the new law brings changes including no more fixed-term tenancies for covered renters and a 2-month notice period for rent increases under the reformed system, so this is exactly the kind of detail worth clarifying before you sign or agree to anything informally.
Also ask the question students often forget: “If one housemate wants to leave and the others want to stay, what happens in practice?” Rolling arrangements can sound straightforward until a shared house starts changing shape.
Renewing soon? Slow down before you auto-agree
A lot of students get caught by speed. An agent sends a renewal email, someone in the group says “just sign it”, and the legal position is never really discussed.
But with the new rules arriving on 1 May, April is exactly the wrong time to rush. Shelter’s student tenancy guidance notes that many student contracts traditionally run through the academic year, but that the Renters’ Rights Act could change a fixed-term AST into an assured periodic tenancy from 1 May 2026.
That means your decision is no longer just about “same house or different house”. It is about flexibility, notice, summer plans and how committed your group really is.
For finalists, placement students and postgraduates, that matters even more. A student at Leeds Beckett, Sheffield, Warwick or Loughborough may suddenly find that a rolling structure suits uncertain plans better than a traditional locked-in arrangement.
One more thing: do not confuse “new rights” with “no admin”
The new rules can improve flexibility and security, but they do not remove the need to stay organised.
Keep paying rent on time, report repairs in writing, check deposit records, and never rely only on a phone call when something important is being agreed.
Shelter and Citizens Advice both make the same broader point in different ways: your rights depend heavily on the kind of tenancy or accommodation you have, and the evidence you keep matters.
The bottom line for students this April
Treat April 2026 as your pre-May admin window.
Work out whether you are in private renting or student accommodation with different rules. Save everything. Ask written questions. Do not sign a renewal casually. And if your summer plans are still uncertain, think carefully about whether a rolling arrangement could help rather than hinder you.
For students across England, the smartest move this month is not panic. It is paperwork.
Blogs you may also like:
- Mid-Tenancy “Mini MOT”: 10 Checks That Protect Your Deposit Later
- From Enquiry to Move-In: What Happens When You Rent with Loc8me?
- The Landlord’s Guide to What Students Actually Want in 2025/26

AI Study Tools Students Are Using in 2026 – and How Not to Get Flagged for Academic Misconduct
By 2026, Artificial Intelligence has stopped being a novelty on campus and started feeling more like part of the furniture.
A major UK survey found that 95% of students use AI in at least one way, while 94% say they use generative AI to help with assessed work.
That does not mean universities have waived everything through, though. It means student life now sits in an awkward but interesting place: AI is common, useful and often genuinely helpful, but the line between “smart support” and “academic misconduct” still matters a lot.
The tools students are actually leaning on
The biggest names are still the familiar ones. Jisc says students are commonly using tools such as ChatGPT, Microsoft Copilot and Google Gemini in everyday study life, whether that is for planning, explaining concepts, generating practice questions or organising workload.
Alongside those general-purpose tools, source-based study helpers are gaining ground too. Google’s NotebookLM is being pushed as a study tool that can summarise lecture notes and create study guides from materials you upload, which explains why it is becoming attractive to students revising from readings rather than just asking a chatbot vague questions.
A second category is the “make my notes usable” group. These are the tools students turn to when a module suddenly becomes reading-heavy, revision-heavy or both. Instead of asking AI to write an answer, students are getting it to turn dense notes into flashcards, quick summaries, mini quizzes, timelines and plain-English explanations.
The University of Birmingham’s guidance openly recognises this kind of use as a study aid for personal learning, as long as the AI output itself is not submitted as assessed work. That is the sweet spot many students are trying to hit in 2026: using AI to understand faster, not to outsource the degree.
Then there is the writing-support category, which is where things get slippery. Tools like Grammarly and built-in AI proofing assistants are popular because they feel harmless. Sometimes they are. But not always.
Loughborough University says that even using AI tools for spelling and grammar should be acknowledged when work is submitted, and that failure to acknowledge inappropriate AI use can be treated as academic misconduct.
In other words, students often get into trouble not because they used a tool at all, but because they assumed “it was only editing” and never checked the local rules.
Why students get flagged in the first place
Most students do not get flagged because they used AI once to explain a difficult theory at midnight. They get flagged when their process stops matching their submission.
Universities are increasingly interested in whether you can show how you arrived at your work, not just whether a detector guessed something. York’s student guidance says an academic misconduct panel may ask for copies of your work if there is suspicion of generative AI use, and advises students to save different copies of their work and be ready to explain how they produced the answer.
Loughborough says something similar, asking students to retain developmental work, drafts and outputs so they can demonstrate their process if requested.
That is why the risky move in 2026 is not “using AI” in the abstract. It is pasting in an essay question, getting a polished answer back, tweaking a few words and hoping nobody notices.
Universities such as Cambridge make the principle pretty blunt: presenting text, ideas or other AI-generated material as your own work is prohibited. UCL, meanwhile, says students should acknowledge generative AI where it has assisted in the process of creating their work.
Different institutions phrase it differently, but the shared message is clear enough: hidden use is the problem, not thoughtful use that sits within the rules.
The practical way to use AI without making life difficult for yourself
The simplest rule is also the most useful one: check the brief before you check the bot.
Some universities are now formalising this in very clear categories. At LSE, departments and courses must state whether generative AI use in assessment is not authorised, limited, or fully authorised.
That matters because what is acceptable in one module may be a problem in the next one, even within the same university. A dissertation module, a coding task and a reflective essay may all have different expectations.
A smart, low-drama approach looks like this. Use AI before writing, not instead of writing. Ask it to test your understanding, quiz you on lecture content, compare two theories, explain a difficult reading in simpler language, or turn your own notes into revision prompts.
If you use it during writing, keep it in a support role: structure ideas, spot gaps, suggest counterarguments, or help you think of better search terms for library databases. Then do the actual thinking and writing yourself.
That is much easier to defend if a tutor asks questions later. It also tends to produce better work, because your submission still sounds like you rather than like a generic internet answer.
It also helps to keep a paper trail. Save prompts, screenshots, version history and rough drafts.
If you are at a university such as Leeds, Loughborough, UCL, Birmingham or Edinburgh, you are very unlikely to be the only student trying to work out the boundaries of AI use. What usually separates the students who stay safe from the ones who get dragged into a misconduct process is transparency.
If you used a tool, say what you used it for. If your university provides a declaration format, use it. If the rules are unclear, ask before submission, not after an email lands in your inbox.
One final mistake students still make
The overlooked issue is privacy. Oxford’s guidance says never upload confidential, sensitive or unpublished material into third-party AI tools, and the Open University says not to provide AI tools with personal or confidential information.
So even if a tool feels brilliant for summarising notes, it is a bad idea to feed it sensitive placement material, identifiable patient information, unpublished research, or someone else’s work. Academic misconduct is not the only risk anymore. Data handling is part of the story too.
For students at places like the University of Birmingham, UCL, Leeds, Loughborough, Edinburgh or LSE, the real lesson in 2026 is not “avoid AI.” It is “use AI in a way you can honestly explain.” That sounds less dramatic, but it is far more practical.
AI is already part of university life. The safest students are not the ones pretending otherwise. They are the ones using it as a study partner, keeping control of their own thinking, and making sure their final submission still belongs to them.
Blogs you may also like:
- Fake Listings and AI Photos: How Students Verify a Property Is Real
- AI Is Changing How Students Find Rooms: What It Means for 2025/26
- Essential Tech That Students Need When Studying at University

Beeston vs Lenton: Where Should University of Nottingham Students Live?
Choosing where to live as a University of Nottingham student can shape far more than just your daily commute. It can affect your budget, your social life, your sleep, your study routine, and even how much you enjoy the city itself.
For many students, the big question often comes down to two familiar names: Beeston or Lenton.
Both are well-known student areas. Both have strong links to the University of Nottingham. Both have their loyal supporters. But they offer quite different lifestyles, and the better choice depends on the kind of student experience you actually want.
If you are weighing up your options, here is a practical look at how Beeston and Lenton compare, and which one might suit you better.
Why This Decision Matters More Than People Think
Students often choose housing quickly, especially when group chats start filling up with talk of deposits, house viewings and “best streets”. It is easy to get swept along by where friends want to live or by what older students say is the obvious choice.
But not every student wants the same thing. One person wants to be near late-night takeaways and busy student houses. Another wants a cleaner high street, easier shopping, and a place that feels a little calmer after lectures. One student may be happy living in the heart of the noise, while another may quietly regret signing too early.
That is why Beeston versus Lenton is not really about which area is “better” overall. It is about which area is better for you.
Lenton: The Classic Student Lifestyle
Lenton has long had a reputation as one of the most traditional student areas for the University of Nottingham. If you imagine rows of student houses, busy pavements, quick access to campus, and a strong social atmosphere, you are probably picturing Lenton.
For many students, that is exactly the appeal. Lenton feels student-heavy, which means there is often a sense that everything around you is built around student life. You are likely to know people nearby, bump into course mates regularly, and find that house parties, casual socials and group meet-ups happen with very little planning.
That sense of closeness can be a big advantage, especially for first-time renters or students who want to feel part of a lively university environment. It can make the year feel energetic and full.
Lenton can also be convenient for getting to University Park, depending on where exactly you live. If you are studying at the University of Nottingham and want to stay closely tied to campus life, it has an obvious pull.
However, the classic student atmosphere comes with trade-offs. Lenton can feel busier, noisier and more chaotic. Some streets can look a little worn by the end of the academic year, and the area can sometimes feel more functional than polished.
If you love activity and don’t mind a bit of mess and noise, that may not bother you at all. If you need more peace to recharge, it may start to wear thin.
Beeston: More Balanced, More Grown-Up
Beeston has become increasingly attractive to students who want a different kind of university experience. It still has a strong student presence, especially because of its location near the University of Nottingham, but it often feels more mixed and more settled than Lenton.
That mix is one of its biggest strengths. Beeston has students, families, professionals and longer-term residents, which gives it a broader neighbourhood feel. For some students, that makes it instantly more appealing. It can feel a bit more grown-up, a bit more organised, and in some parts, a bit easier to live in day to day.
The town centre is a real plus. Beeston has a useful high street, supermarkets, cafés, charity shops, restaurants, tram connections and general everyday convenience. It feels less like a student bubble and more like a place where people actually build routines.
That can make a surprising difference over the course of a year. When deadlines pile up, having a decent coffee spot, an easy food shop, and a more relaxed local environment can be more valuable than students first realise.
For postgraduates, finalists, mature students, and undergraduates who are starting to move away from the constant buzz of student social life, Beeston often feels like a smart compromise.
It keeps you connected to university life without making it the only thing around you.
Which Area Is Better for Getting to Campus?
For University of Nottingham students, the answer depends partly on which campus you use most.
If you are based mainly around University Park, both Beeston and Lenton can work well. Lenton is often seen as the more traditional student choice for easy campus access, but Beeston is also well positioned, particularly for some parts of University Park and for transport options. The tram and bus links can be useful, and cycling from Beeston is common.
If you are connected to Jubilee Campus, Lenton can often feel especially convenient. That is one reason why it remains popular. You may find getting to lectures and back feels slightly more woven into daily life there.
Students at other universities in Nottingham, such as Nottingham Trent University, may also hear these two areas mentioned, although NTU students often look more closely at city-centre-adjacent locations depending on their campus.
That makes this comparison especially relevant for University of Nottingham students rather than a universal Nottingham student rule.
The key point is that neither Beeston nor Lenton is a poor choice for location. This is less about one being near campus and the other being far away, and more about how you want the rest of your life outside lectures to feel.
Social Life: Busy and Immediate or More Varied?
This is where the difference becomes very clear.
Lenton is often better suited to students who want social life on the doorstep. It is easier to live in the middle of the student crowd there. Nights out can begin earlier, casual plans happen faster, and the whole area can feel like an extension of university life itself.
If that sounds exciting rather than exhausting, Lenton may suit you well.
Beeston’s social life tends to feel more varied. It is not dead at all, but it is not quite as dominated by the student scene. You can still go out, meet friends, and enjoy student life, but the overall atmosphere is usually less intense. It may suit students who want to socialise on purpose rather than feel surrounded by it every night of the week.
That difference matters more than students sometimes admit. Some people thrive in a highly social environment. Others find they work better, sleep better and generally feel better in an area where they can dip in and out.
Costs, Value and What You Actually Get
Housing costs can shift year to year, but students often find themselves looking beyond headline rent and thinking about value. A house that seems cheaper at first can feel less appealing if it is tired, cramped, poorly insulated or awkwardly located for day-to-day life.
Lenton has plenty of student housing stock, which means options can be broad, but quality can vary. Some houses are well-kept and well-managed, while others feel like they have seen a few too many student cohorts pass through. Students often accept this in exchange for location and social convenience.
Beeston can sometimes feel like better overall living value, especially if you care about the area outside the house itself. You may find the wider setting, transport links and amenities make the experience feel more sustainable over a full academic year.
It is also worth thinking beyond rent alone. Food shopping, transport, takeaway habits, and how often you end up travelling elsewhere all affect the real cost of living.
Who Usually Suits Lenton Best?
Lenton often works well for students who want the classic university-house experience. It suits those who want to be around lots of other students, enjoy spontaneous socialising, and do not mind a bit of noise or disorder if it means being close to the action.
It can be especially appealing for second-year groups who want the full shared-house experience after halls. For many, it feels like the natural next step in University of Nottingham life.
If your ideal year involves busy houses, lots of nearby friends and a location that feels deeply tied to student culture, Lenton makes a strong case.
Who Usually Suits Beeston Best?
Beeston often suits students who want balance. That includes postgraduates, mature students, quieter undergraduates, students with heavier academic workloads, and anyone who likes the idea of living in an area that still works outside the student calendar.
It can also suit students who are starting to think a bit more practically about daily life. Being able to shop easily, get a coffee somewhere nice, travel smoothly and come home to a slightly calmer setting becomes more attractive with time.
Students choosing between universities across the United Kingdom often hear about this kind of split in other cities too. Areas near the University of Bristol, the University of Leeds or the University of Sheffield often have similar choices between a louder student hub and a slightly more balanced neighbouring area.
In that sense, the Beeston versus Lenton question is part of a bigger student housing pattern: do you want to live in the centre of student life, or near it?
So, Where Should University of Nottingham Students Live?
There is no universal winner, but there is a clear lifestyle difference.
Choose Lenton if you want the classic student atmosphere, easy social momentum, and a year that feels fully immersed in university life. Choose Beeston if you want a more rounded neighbourhood, a calmer day-to-day environment, better high street convenience, and a student experience that feels a little more grown-up.
For many University of Nottingham students, the real answer comes down to personality. If you are energised by people, noise and spontaneity, Lenton may feel like the place where the year truly happens. If you want a better blend of university and real-life routine, Beeston may quietly win you over.
In the end, the best student area is not the one everyone talks about most. It is the one that helps you live well, study well, and enjoy Nottingham in a way that suits you.
Blogs you may also like:
- Why Beeston Is a Great Place to Live as a Nottingham Student
- The Best Student Hotspots You Need to Know About in Beeston
- Exploring the Best Neighbourhoods for Students in Nottingham
Read More

Why Students Are Rushing to Secure Housing Earlier (and How to Avoid Scams)
For many students across the United Kingdom, the search for accommodation seems to start earlier every year. What once felt like a task for late spring now often begins not long after the academic year has settled in.
In cities with large student populations such as Nottingham, Leeds, Manchester, Birmingham, Bristol and Leicester, it is not unusual for students to hear talk of next year’s housing plans while they are still adjusting to the current one.
That early pressure can create a stressful atmosphere. Friends start forming groups, letting agents begin advertising, and rumours spread that “all the good houses will be gone.” For students at universities such as the University of Nottingham, Nottingham Trent University, the University of Leeds, the University of Manchester and De Montfort University, the fear of missing out can be enough to push quick decisions.
Unfortunately, that sense of urgency can also make students more vulnerable to scams, misleading listings and unsafe payment requests.
Why the Student Housing Race Starts So Early
Part of the reason students are rushing is simple competition. In popular student areas, there are only so many well-located, reasonably priced homes to go around.
Properties close to campus, public transport, nightlife or city centres tend to attract attention first. Students naturally want the best mix of affordability, convenience and comfort, so the strongest options often create early demand.
There is also a social element to it. Student housing decisions are rarely made alone. Friendship groups want certainty, and once one person starts talking about securing a house, the rest can feel pressured to commit.
Nobody wants to be the one left behind when housemates are being chosen. That emotional pressure can lead to rushed viewings, skipped checks and decisions based more on panic than logic.
Landlords and agents are not always to blame for this environment, but the pace of the market can encourage a “move quickly or lose it” culture. For students, especially first-years preparing for second year, that can be difficult to navigate. Many are renting without much previous experience, and some may be living away from home for the first time.
Why Scammers Thrive in a Fast-Moving Market
Scammers tend to do well when people feel rushed, distracted or inexperienced. Student renters can fall into all three categories. A fraudster does not need an especially convincing story if the target already believes they must act immediately.
Fake listings, copied photos, pressure to pay a holding deposit on the same day, and excuses about being unable to show the property in person are all common warning signs.
Scams can appear on social platforms, marketplace sites, messaging apps and even on websites that look professional at first glance. In some cases, the property does exist, but the person advertising it has no right to rent it out.
International students and those relocating from other cities can be particularly exposed. Someone moving to study at the University of Warwick, the University of Bristol or King’s College London may have little choice but to begin the search remotely, making it harder to judge whether a listing is genuine.
A Smart Remote Viewing Checklist
Remote viewings can be genuinely useful, especially when distance makes travel difficult, but they should never mean lowering your standards. A proper virtual viewing should feel thorough, not rushed.
Ask for a live video call rather than relying only on pre-recorded clips. During the call, request that the person walks through the property in real time and shows specific details, such as bedroom windows, door locks, kitchen appliances, the boiler, bathrooms and any signs of damp or damage.
If they refuse or keep making excuses, that should ring alarm bells.
It is also worth asking them to step outside briefly and show the building exterior and street. That helps confirm the property matches the address provided.
Students should also ask practical questions during the viewing. What is included in the rent? Are bills included? Is there a guarantor requirement? When does the tenancy begin and end? Is there a deposit protection scheme in place?
A genuine landlord or agent should be able to answer these confidently and consistently.
What Proof Should Students Ask For?
Before paying anything, students should ask for proof that the property and the person advertising it are genuine. That does not mean becoming overly suspicious of every landlord, but it does mean acting with care.
You can ask for the full property address, the landlord or agency name, and written tenancy documents before handing over money.
If it is a letting agent, check that the company has a legitimate office presence, a working website and reviews that feel authentic rather than strangely repetitive. If it is a private landlord, ask for identification and proof that they are connected to the property.
Students should also request a draft tenancy agreement and read it properly. A real agreement should clearly state rent, deposit, tenancy dates, responsibilities and cancellation terms. If someone asks for money before providing paperwork, that is a sign to slow down.
Payment Safety Matters More Than Ever
One of the biggest mistakes students make is sending money too quickly. A scammer will often push for an urgent bank transfer, claiming that several other students are interested and that immediate payment is the only way to secure the room.
Never send money in cash, through unusual transfer services, or to an account that does not match the landlord or agency details you have been given. Avoid paying purely because someone says the property will disappear within the hour.
Genuine accommodation may move quickly, but legitimate landlords and agents should still provide proper documentation and a reasonable process.
It is also sensible to keep records of everything. Save emails, screenshots, payment confirmations, contracts and messages. If something goes wrong, that paper trail could make a major difference.
How to Protect Yourself Without Missing Out
The key is not to move slowly for the sake of it. It is to move carefully. Students can still act early and stay safe by preparing in advance.
Decide your budget, preferred area, housemate group and non-negotiables before you begin. That way, when a suitable property appears, you can respond quickly without abandoning common sense.
It also helps to use trusted channels where possible, including university housing services, student accommodation teams, or well-known local agents in university cities.
Many institutions, including large UK universities, offer guidance for private renting and may point students towards safer routes.
Final Thoughts
The rush to secure housing earlier is understandable. Competition is real, and nobody wants to be left scrambling for a room at the last minute. But pressure should never outweigh protection.
A good property today is not worth a costly mistake tomorrow.
For students, the best approach is a calm one: view carefully, ask for proof, pay safely and trust your instincts. In a market that often rewards speed, a little caution can be the difference between securing a home and walking into a scam.
Blogs you may also like:
- Student Myths vs Reality: What Living in Student Housing is Really Like
- What Does Private Accommodation Offer Students That On-Campus Student Housing Doesn’t?
- What Are Some of the New Initiatives Coming into Place for Student Housing?

5 Ways to Spend Your Spring Break as a UK Student (Including Easter Celebrations)
Spring break can feel like a bit of an in-between moment in the student calendar. Exams may be creeping closer, deadlines might still be lingering in the background, and the weather is finally starting to hint at brighter days ahead.
For students across the United Kingdom, from the University of Birmingham and the University of Leeds to the University of Bristol and the University of Nottingham, it is often the first real chance of the year to pause, reset and enjoy some freedom before the final academic push.
The good news is that spring break does not need to be expensive or overly planned to be memorable.
Whether you stay in your university city, head home for a few days, or use the time to explore somewhere new, there are plenty of ways to make it feel rewarding. And with Easter often falling during this period, there is also a natural opportunity to enjoy seasonal traditions, community events and a slower pace.
Here are five great ways to spend your spring break as a UK student.
1. Recharge Properly and Give Yourself a Real Reset
Many students go into spring break thinking they need to be productive every second of the day, but sometimes the smartest thing you can do is properly switch off. After months of lectures, seminars, coursework and part-time shifts, your mind often needs a break just as much as your timetable does.
That does not mean spending the entire week doing nothing, but it can mean creating a more balanced routine.
Catch up on sleep, get outside in the daylight, cook proper meals and take a break from constantly checking university emails. Even a few days of structure without pressure can make a huge difference to how you feel.
For students at places such as the University of Exeter, Durham University or the University of York, spring often brings campus gardens and surrounding green spaces back to life. A simple walk, a café visit with friends, or an afternoon away from your screen can feel surprisingly restorative.
Spring break should not always be about doing more. Sometimes it is about recovering enough to finish the term well.
2. Celebrate Easter in a Way That Feels Meaningful
Easter can bring a lovely sense of occasion to spring break, even if you are not particularly religious. Across the UK, the Easter period is often tied to family meals, local events, church services, seasonal food and that general feeling that winter is finally losing its grip.
If you are heading home from university, Easter can be a great excuse to reconnect with family and enjoy traditions you may have missed while living away. That might mean a Sunday roast, an Easter egg hunt with younger siblings or cousins, baking something simple, or just enjoying the comfort of home without the usual rush.
If you are staying in your university city, there are still ways to mark the occasion. Many cities with large student populations, including Manchester, Sheffield and Newcastle, often have spring markets, local food events and Easter-themed activities around the city centre.
Students at the University of Glasgow or the University of Edinburgh might find that even a walk through the city during Easter weekend feels a little more lively and festive.
For those who do observe Easter religiously, spring break can also be a meaningful time to attend services, spend time in reflection and reconnect with a faith community. Whether it is cultural, spiritual or simply seasonal, Easter can add a warm and memorable dimension to the break.
3. Explore a New UK City Without Blowing Your Budget
One of the best things about being a student in the UK is that so many cities are relatively easy to reach by train or coach. Spring break is a good time to play tourist for a couple of days, especially before the heavy revision season begins.
You do not need to plan a huge trip. A simple overnight stay or even a day trip can give you a change of scenery and a proper mental refresh.
Students at the University of Warwick might head to Birmingham or Oxford, while those in Liverpool could explore Chester or Manchester. If you study in London, you could use the break to finally visit places you always say you will get around to seeing.
The trick is to keep it realistic. Look for advance train tickets, split costs with friends, and focus on low-cost activities such as museums, parks, walking tours and food markets. Spring weather often makes city exploring much more enjoyable than it is in the darker winter months.
A change of place, even briefly, can help break the cycle of lectures, library sessions and student housing routines. It gives your brain something fresh to focus on, which is often exactly what is needed.
4. Do Something Social That Is Not Just Another Night Out
Spring break can be a brilliant time to reconnect with people in a more relaxed way.
During term time, socialising can become repetitive quite quickly. Nights out, rushed coffees between lectures and the occasional flat catch-up tend to dominate. The break gives you more room to do something different.
That could mean organising a picnic if the weather cooperates, planning a film night, visiting a botanical garden, going for brunch, or taking a day trip with your housemates. Students in cities such as Bristol, Nottingham and Leeds have loads of options when it comes to low-pressure social activities that do not revolve entirely around clubs and bars.
This matters more than it might seem. University life can get lonely, even when you are surrounded by people.
Spending quality time with friends in a calm and enjoyable setting can do a lot for your mood. Spring has a way of making everything feel a little lighter, and social plans often feel more appealing when they are not squeezed into a packed academic week.
5. Get Ahead Gently Before the Final Term Push
Not every part of spring break has to be pure leisure. In fact, one of the best uses of the time is getting yourself in a better position for the weeks ahead, without turning the whole holiday into a revision camp.
This could be as simple as reviewing your deadlines, tidying your notes, sorting your room or planning meals and your student finances for the next few weeks.
Students at universities such as King’s College London, the University of Southampton or Cardiff University often find that the final stretch of the academic year becomes far more manageable when they use spring break to regain a sense of control.
The key word is gently. You do not need to study for ten hours a day to make spring break worthwhile. Even a few focused sessions can reduce stress later on. Think of it as helping your future self rather than punishing your present one.
Make the Break Feel Like Your Own
Spring break does not have to look the same for everyone.
Some students will travel, some will work shifts, some will go home, and some will stay put in their university accommodation. What matters is using the time in a way that leaves you feeling better, not worse.
Whether that means celebrating Easter, exploring somewhere new, reconnecting with friends or simply catching your breath, the best spring breaks usually mix rest with a little intention. For UK students, that balance can be exactly what makes the season feel refreshing before university life speeds up again.
Blogs you may also like:
- A Few Things Before You Go: The Pre-Easter Student Checklist
- What Students Can Do During the Easter Break
- Top Tips for Students to Make the Most of the Early May Bank Holiday

Spring Clean Season: The 30-Minute Room Reset That Protects Your Deposit
As spring arrives and the light starts pouring through the windows a little more honestly, student rooms have a habit of revealing everything they have been hiding since winter.
Dust on the skirting boards, mystery marks on the desk, clothes draped over chairs, crumbs in places no snack was ever meant to reach, and that one corner of the room that has quietly turned into a storage zone.
For students in shared houses or rented accommodation, this is not just about appearances. A quick room reset can make a real difference when it comes to protecting your tenancy deposit.
Across student cities such as Nottingham, Leeds, Manchester, Birmingham and Leicester, many renters only start thinking seriously about cleaning when inspection season approaches or move-out is getting close.
But the good news is that keeping your room in decent shape does not have to mean dedicating an entire Sunday to scrubbing. A focused 30-minute reset, done regularly, can help stop mess from building up and reduce the risk of avoidable charges later on.
Why a Quick Reset Matters More Than You Think
When people hear the phrase “protect your deposit”, they often imagine dramatic damage such as broken furniture, stained carpets or holes in walls.
In reality, smaller cleaning issues can also cause problems. Landlords and letting agents may raise concerns about rubbish left behind, mould around windows, built-up grime, food waste, sticky surfaces or marks that have clearly been ignored over time.
That matters in student areas around universities such as the University of Nottingham, the University of Leeds or De Montfort University, where high-turnover rental properties are common and end-of-tenancy standards can be strict. A room does not need to look hotel-perfect, but it does need to look cared for. Regular light cleaning makes that far easier than leaving everything until the final week.
A 30-minute reset works because it is manageable. It is long enough to make visible progress, but short enough that you are more likely to actually do it.
Start With the Fastest Win: Clear the Floor
The quickest way to make a room feel cleaner is to clear the floor. Shoes, bags, cables, laundry and random packaging instantly make a space feel more chaotic than it really is. Spend the first few minutes putting obvious items back where they belong.
Dirty clothes should go in a laundry basket, not on the floor or hanging over the radiator. Rubbish should go straight into a bin bag. If you have got coursework, notebooks and chargers spread everywhere, stack them neatly or return them to a shelf.
Students at places like the University of Manchester or Sheffield Hallam University often live in compact rooms where clutter builds up fast, so this step has a bigger impact than people expect.
Once the floor is visible, the whole room already looks more in control.
Tackle Surfaces Before Dirt Settles In
Desks, bedside tables, shelves and windowsills collect dust surprisingly quickly, especially during term time when rooms are used for everything from studying and eating to streaming and sleeping.
Wipe hard surfaces with a cloth and a suitable spray or warm soapy water. Pay attention to rings from drinks, crumbs, food spills and make-up marks. This is not just about neatness. Leaving stains or sticky residue for too long can lead to permanent marks, especially on cheaper furniture often found in student accommodation.
If you are renting in cities with large student populations such as Bristol, Liverpool or Newcastle, chances are your room has already had several tenants before you. That means furniture may already be a little worn, so it is worth being extra careful not to add to the damage.
A clean desk also makes your room feel calmer, which is a useful bonus during assignment season.
Don’t Ignore the Areas That Trigger Deposit Problems
Some of the biggest deposit issues come from the places people overlook.
Window sills with condensation, bins that have not been emptied properly, dusty skirting boards, food left in mugs, and the area around the bed can all let a room slip from “lived in” to “poorly maintained”.
If your room gets cold and damp, check around the window for early signs of mould. Wipe away moisture and keep the room ventilated where possible. In many student homes, particularly older terraces in places like Nottingham, Lancaster or Durham, condensation can become a genuine issue if it is ignored.
While not every mould problem is the tenant’s fault, failing to keep the room aired out and reasonably clean can still lead to disputes.
Also take two minutes to empty your bin, change the liner and remove any plates, bowls or cups. A room can look tidy at first glance, but if it smells stale or has hidden food waste, it will not feel clean for long.
Fresh Bedding Changes the Whole Room
One of the most effective parts of a room reset is changing or straightening your bedding. It sounds basic, but it transforms the space immediately. A made bed makes the whole room look more organised, even if everything else is not perfect yet.
Fresh bedding also helps with hygiene, especially during spring when hay fever starts creeping in and rooms can feel stuffy.
For students balancing deadlines, part-time work and social plans at places such as the University of Birmingham or Nottingham Trent University, it is easy to let bedding changes slide. But if you do nothing else during your 30-minute reset, sorting the bed gives the room a sense of order.
It also helps reduce the build-up of smells, dust and allergens, which is never a bad thing in shared accommodation.
The Final Five Minutes: Think Like an Inspector
The best way to finish your reset is to stand at the door and look at the room the way a landlord, cleaner or inventory clerk might.
Is there anything obviously dirty, stained, overflowing, damp or neglected? Are there marks on the mirror? Is the bin full? Are clothes piled up in a corner? Does the room smell fresh?
This final check is where you catch the little things before they turn into bigger issues. Protecting your deposit is often less about one big deep clean and more about showing a pattern of care. A room that looks consistently looked after is easier to restore fully when move-out day comes around.
Spring cleaning does not have to be dramatic. For students, especially those renting near busy UK universities, the smartest approach is often the simplest one. Thirty minutes, a bit of focus, and a willingness to reset the room before it gets out of hand can go a long way.
Your future self, and your deposit, will thank you for it.
Blogs you may also like:
- Top Tips for Spring Cleaning Your Student Accommodation
- Top Tips on How to Personalise Your Student Accommodation to Make It a Home
- Spring Term “Sick Season”: What To Do If You’re Ill in a Shared House

Spring Term “Sick Season”: What To Do If You’re Ill in a Shared House
Across the United Kingdom, spring term has a familiar feel to it. Lecture theatres fill up again, deadlines start gathering pace, and shared student houses begin to sound slightly worse for wear.
One person has a sore throat after a week of early seminars, another is coughing through a library session, and before long the kitchen is full of tissues, lemsip sachets and half-finished mugs of tea.
From students at the University of Nottingham and Nottingham Trent to housemates studying at the University of Leeds, De Montfort University, the University of Birmingham or the University of Manchester, “sick season” is something many students know all too well.
Living in a shared house is one of the classic parts of university life, but it does make illness harder to contain. When several people share a kitchen, bathroom, hallway, sofa and fridge, germs do not have to work very hard.
If you become ill during spring term, knowing how to handle it properly is not just about getting yourself back on your feet. It is also about hygiene, food, boundaries and showing consideration to the people you live with.
Why Bugs Travel Fast in Student Houses
In student cities across Britain, many shared homes are busy, compact and full of overlapping routines.
A house near the University of Leicester might have six people sharing one kitchen. A terrace in Selly Oak near the University of Birmingham might see housemates coming in and out at completely different hours. In areas around the University of Manchester, the University of Sheffield or Leeds Beckett, students are often balancing seminars, part-time jobs, nights out and packed social calendars.
That constant movement gives colds and flu-like illnesses plenty of chances to spread.
It is rarely just about being in the same room as someone who is ill. In reality, germs pass through all the little things that shape shared-house life. Door handles, kettle handles, fridge shelves, taps, light switches and worktops all become contact points.
Add in poor sleep, stress, cold weather and not always eating brilliantly, and many students end up more run down than they realise.
Spring term can feel especially draining because it comes after the disruption of winter, but before the final push of exams and end-of-year deadlines. That middle stretch often catches people out. You may think you are only tired, when in reality your body is already struggling.
Tell Your Housemates Early
One of the most useful things you can do if you start feeling ill is simply be honest about it. You do not need to make a dramatic statement, but a quick message in the house group chat or a calm word in the kitchen makes a difference.
If you have come down with a cold, flu symptoms or something more unpleasant, letting your housemates know helps them respond sensibly.
That is particularly important in a student house because everyone’s week can look completely different. One person may have a lab session at the University of Warwick, another may be preparing for a presentation at Aston University, while someone else is travelling home for the weekend.
A bit of notice gives everyone the chance to be more careful without things becoming awkward.
Being upfront also helps if you need support. Most housemates are far more willing to help if they know what is going on. Asking someone to grab tissues, medicine or a few bits of food from Tesco, Boots or the nearest convenience shop is usually no problem when people understand you are genuinely under the weather.
Hygiene Is the Biggest Help
When illness enters a shared house, hygiene matters far more than pretending everything is normal.
This is the point where small habits begin to count. Washing your hands properly, using tissues, binning them straight away and wiping down shared surfaces can all reduce the chances of everyone catching the same thing.
In many student homes, the issue is not just coughing or sneezing. It is touching the fridge door after blowing your nose, leaving used mugs on the coffee table, or lingering in the kitchen and handling cupboards, counters and taps while feeling rough.
Shared spaces need a little more attention when someone is unwell.
That does not mean the whole house needs to become spotless overnight. It just means the basics matter more. A quick wipe of kitchen sides, bathroom taps, toilet handles and door knobs can go a long way.
In older UK student properties, where ventilation is not always brilliant, even opening the windows for a short while can make the place feel fresher and less stale.
For houses in popular student areas such as Lenton, Fallowfield, Headingley, Hyde Park or Clarendon Park, where people often live close together in older rented homes, that extra bit of care is especially helpful.
Food and Fluids Become More Important Than Usual
When you are ill, eating properly can feel like a chore, especially if you are tired, congested or just not very hungry. But food and fluids still matter.
The aim is not to cook an ambitious meal. It is to keep things simple and manageable. Toast, soup, pasta, rice, fruit, yoghurt and easy snacks are often enough to get you through the worst of it.
Drinking enough is just as important. Water, hot drinks and anything gentle on the stomach can help, particularly if you are feeling feverish or generally drained. In student life, it is easy to underestimate how much worse illness feels when you are dehydrated, under-rested and trying to survive on random cupboard food.
Shared food habits also need a bit more care at this point. In many houses, people get relaxed about borrowing milk, using each other’s condiments or sharing cutlery without thinking.
When somebody is ill, that casual approach is less wise. It helps to keep your own food separate, wash your plates and mugs promptly, and avoid sharing drinks or snacks directly.
Housemates can be surprisingly helpful here. A simple gesture, such as leaving a banana, some soup or a cup of tea outside someone’s room, can make a difficult day feel much more manageable. Student living is not always known for its organisation, but a bit of kindness tends to go a long way.
Boundaries Help Keep the Peace
When somebody is ill in a shared house, boundaries matter.
The unwell person often needs quiet, rest and a bit of space. At the same time, other housemates may want to avoid catching whatever is going around, especially if they have exams, coursework deadlines or placements.
That can mean making sensible adjustments for a few days. Perhaps the person who is ill avoids sitting in the shared lounge all evening. Perhaps housemates keep a bit of distance in the kitchen. Perhaps people agree to keep the noise down at night rather than inviting a large group back after the SU.
None of that needs to be dramatic. It is just part of living with other people responsibly.
This is particularly relevant in university cities where social schedules can be full on. A student at Bristol, York or Newcastle may still feel pressure to attend events, socials or nights out even when they are clearly unwell. But trying to “push through” can drag recovery out and spread germs more widely.
Sometimes the most considerate thing you can do is rest properly and stay out of shared spaces as much as possible.
Know When It Is Time To Seek Help
Most spring term illnesses are unpleasant rather than serious, and many pass with sleep, fluids and a few easier days.
But it is important not to dismiss everything as “just student flu”. If symptoms become severe, breathing feels difficult, a temperature stays very high, dehydration becomes a concern or things worsen instead of improving, it is worth taking more seriously.
Students at universities such as King’s College London, the University of Bristol, the University of Exeter or anywhere else in the UK should remember that support is available beyond the house itself.
University wellbeing teams, local services and NHS support all have a role when an illness goes beyond the usual rough few days. Shared-house culture can sometimes normalise suffering in silence, but that is not always the right response.
A Better Shared House Starts With Consideration
Spring term “sick season” is a common part of university life in the UK, whether you are living with course mates in Nottingham, friends in Leicester, or housemates in Leeds, Birmingham or Manchester. But while illness may be common, household chaos does not have to be.
A shared house works best when people are honest, hygienic and respectful of one another’s space. That means speaking up when you are ill, taking care with food and surfaces, and recognising that boundaries are not rude. They are part of living together well.
In the end, being a good housemate when you are ill is not about being perfect. It is about common sense. In a student home, that matters more than people sometimes realise. A little extra thought can stop one person having a bad week from turning into the whole house going down with it.
Blogs you may also like:
- Top Tips for Spring Cleaning Your Student Accommodation
- How to Get Involved in National Self Care Week
- Why Student Health Matters: A Guide to Staying Healthy at University